


English
Grow Tent High CFM Support Pole Kit Manual
Warning
Please read the following instructions before use:
-
Check your tent size and pole size before installation.
-
This product is not designed to function as a ceiling rod for hanging devices or as structural support for a tent.
-
DO NOT hang or place items on the support poles.
-
DO NOT attach trellis nets to the support poles.
-
DO NOT place heaters or other heat-emitting devices near the support poles.
-
Keep the poles out of reach of children to prevent suffocation or injury.
-
Regularly inspect the poles and connectors to ensure the tent is securely assembled.
-
Handle all metal components with care during assembly to avoid injury from sharp edges.
Product Contents
MODEL: VST-SP1
|
φ 19 mm |
4 PCS |
|
φ 16 mm |
4 PCS |
|
Screw Cap |
4 PCS |
|
Hook |
8 PCS |
|
Gasket |
10 PCS |
MODEL: VST-SP2
|
φ 19 mm |
4 PCS |
|
A: φ 16 mm |
4 PCS |
|
B: φ 16 mm |
4 PCS |
|
Screw Cap |
8 PCS |
|
Hook |
8 PCS |
|
Gasket |
10 PCS |
Specifications
Model |
VST-SP1 |
VST-SP2 |
Material |
PP (Hooks) Metal (Rod) ABS (Fastener) |
PP (Hooks) Metal (Rod) ABS (Fastener) |
Compatible Tent Size |
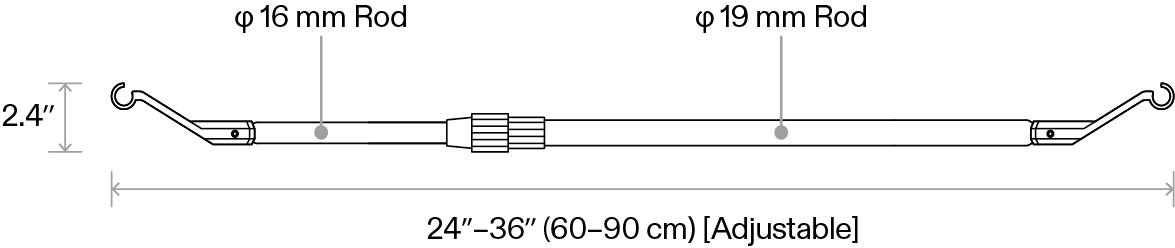
24"–36" (60–90 cm) |
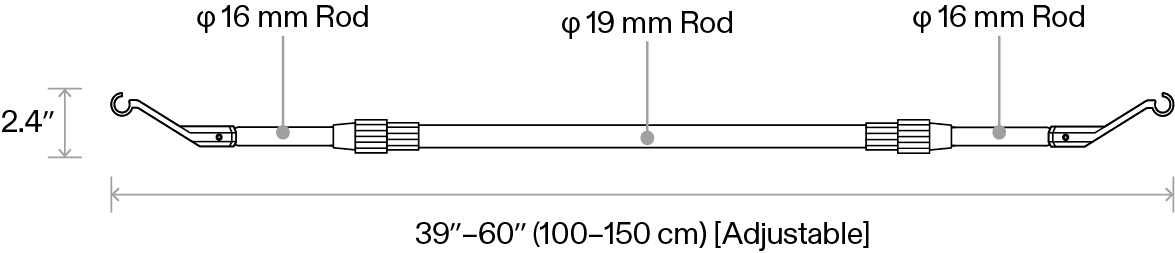
39"–60" (100–150 cm) |
Compatible Pole Size |
16–19 mm |
16–19 mm |
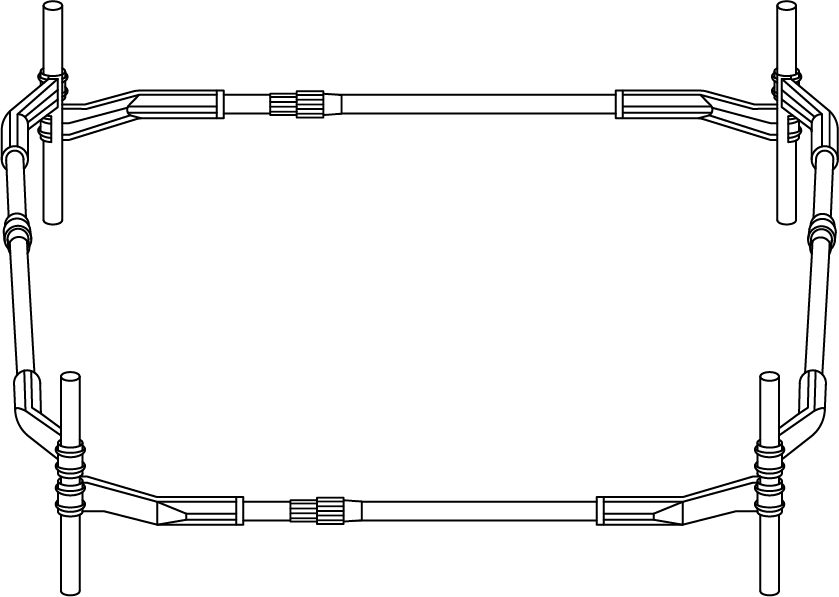
VST-SP1
Extendable Rod
VST-SP2
Extendable Rod
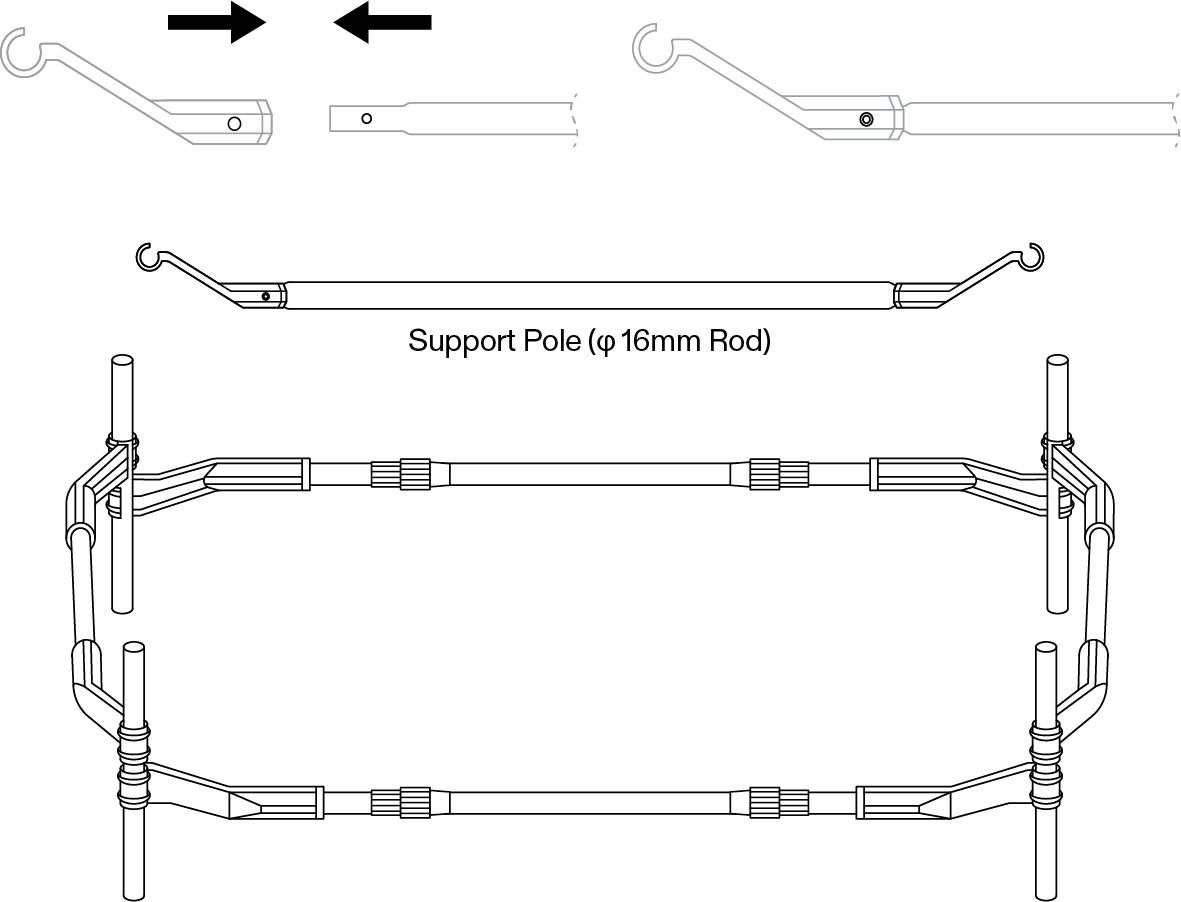
Individual Rod(B) 16 mm
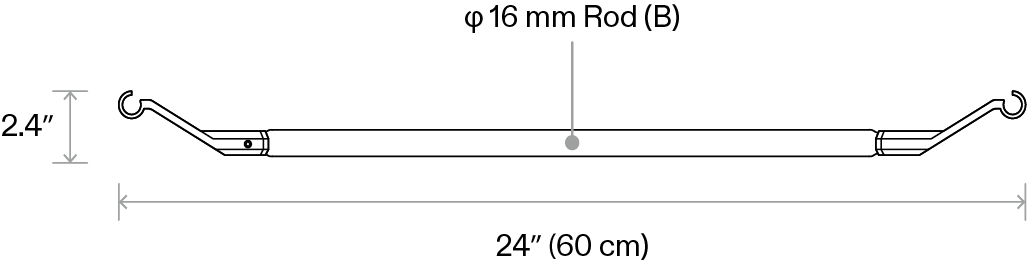
The 16 mm rod (B) needs to be pulled out from the extendable rod. This rod has only one button to secure the hook. For 4'×2' tents, you will need to remove two 16 mm rods (B) and use them together with two complete poles.
Installation
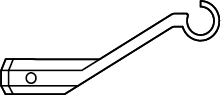
Step 1: Install the Hooks
Press the button on the rod and slide the hook in until the button clicks into place and locks. Install hooks on both ends of each extendable rod.

Step 2: Assemble and Adjust the Rod
Place the screw cap on the 19 mm rod without tightening, insert the 16 mm rod, lightly secure the cap, and ensure all hooks are aligned in the same direction.
Note: The 16 mm rod has only one button to secure the hook.

Step 3: Mount the Support Poles
Choose an appropriate height—typically around half the tent’s total height—for mounting the support poles. Loosen the fastener on the extendable rods and extend the support pole until it fits the distance between the tent’s upright poles. Clip the hooks onto the poles with the "arch" facing outward to support the tent walls. Tighten the fastener once the extendable rods are secured.
Ensure the "arch" of the support poles always face outward to properly support the tent walls.
Tips:
-
Use your palm to press the hooks onto the tent poles.
-
The first installation may require significant force to install and fasten securely.
For 4'×2' Tents
For 4'×2' tents, remove the 16 mm B-rod from the extendable rod (VST-SP2) and install hooks on both ends. You will need two B-rods and two additional extendable rods to fit the tent. Repeat the previous installation process to mount the two B-rod support poles on the short sides of the tent and the two extendable-rod supporters on the long sides.
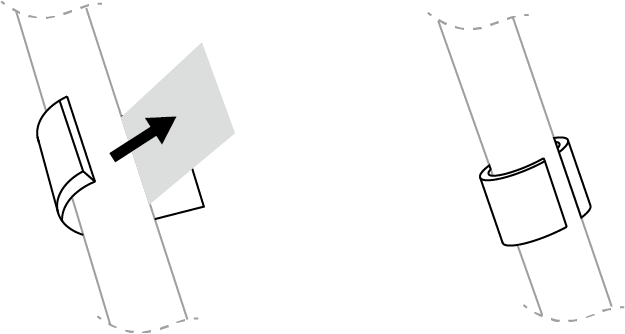
Using Gaskets When Necessary
If you believe the attachment is not secure (such as on smaller poles), a gasket may be required to reinforce the connection. Generally, a gasket will not be needed initially, but keep them on hand in case you find the connection is not secure enough later.
Step 1: Peel the sticky side of a gasket and attach it around the tent pole at an appropriate height, as shown in the diagrams below. Repeat the process to attach the remaining gaskets to the other tent poles.
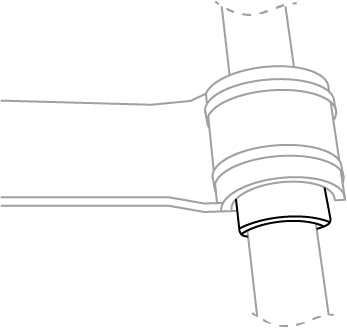
Step 2: Then push the hooks of the support poles onto the gaskets to mount them on the tent poles, with the "arch" facing outwards to support the tent walls.
Warranty
VIVOSUN offers a 2-year limited warranty on this product purchased directly from us or our authorized dealers, beginning on the original date of purchase.
This warranty is provided in addition to, and does not affect, your statutory rights under applicable consumer protection laws in the country where the product was purchased.
For the full Warranty Policy, please visit: https://www.vivosun.com/help/warranty-policy
Alternatively, you may contact customer service at support@vivosun.com / +1 888-505-8486.
Contents

We help you grow your best green.

We provide the highest quality.

We relentlessly pursue the future.

We make growing more enjoyable.

We support every grower.
Sign up and get 10% off your first order
©2026 Vivosun All Rights Reserved